Products
Solutions
Resources
One of my favorite and most used tools at Facebook was the macro tool.
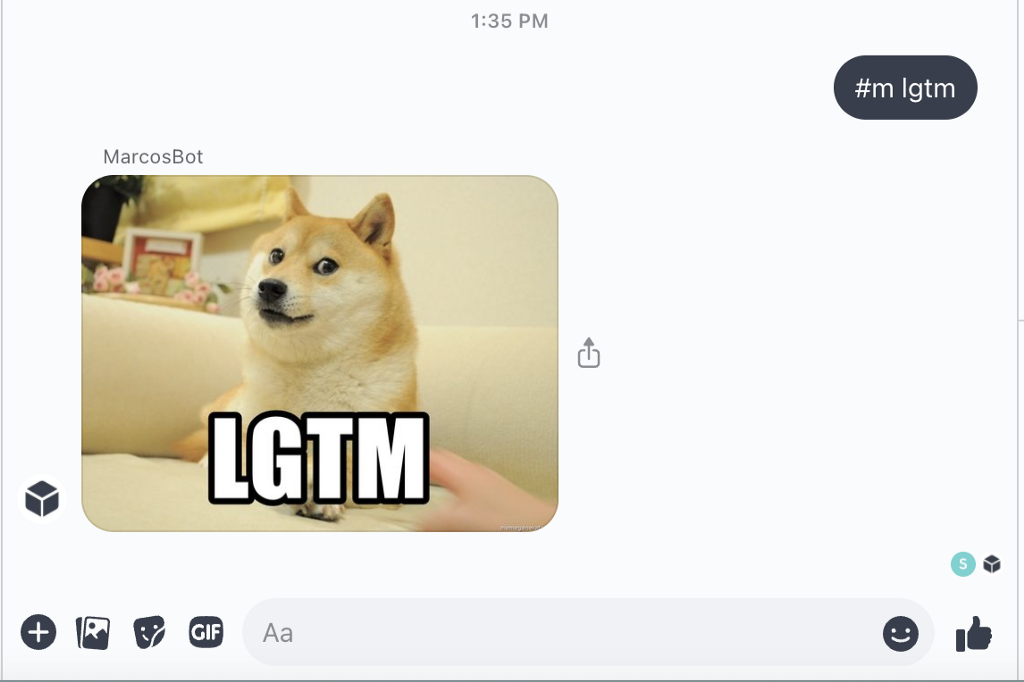
The macro tool allowed employees to upload an image or gif, name it, and then use it across many internal surfaces. Within Workplace, all you had to do was type #m followed by the name of your macro and the macro bot would respond to your comment or message with the macro associated with that name. For example, if you typed “#m lgtm” the bot would respond with the macro lgtm, an image of a doge saying looks good to me.

But why have a dedicated tool instead of sending the image yourself each time? A few main reasons:
If you know the name of the macro you want to use, it’s a lot faster for you to type the name than to find the image on your computer each time you want to use it.
Once a macro is made, anyone at the company can easily use it.
All the macros are located in one place for everyone at the company, making it easy to find and build off of other macros. On Facebook Gaming, we had a series of macros that were ghost-themed and built off one another into an expansive universe.
It’s just fun ¯\(ツ)/¯
To bring some of the fun of macros to Statsig, some teammates and I set out to recreate the macro tool and named it marcos in honor of our manager Marcos. I began work bringing the tool to Workplace using a custom integration. Here is how I accomplished this:
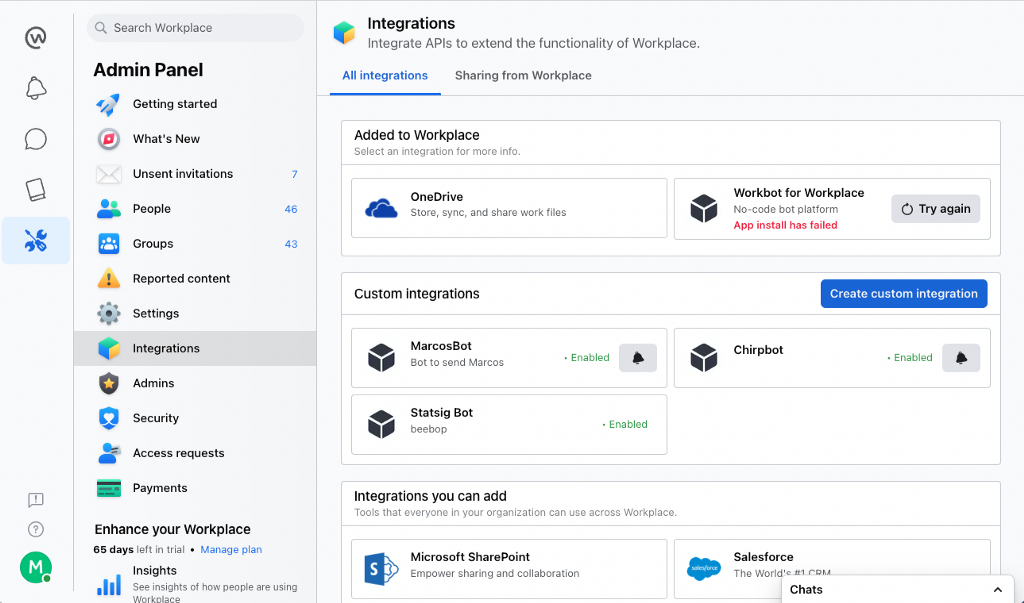
1. Create a Custom Integration within Workplace
Note: You must be an Admin to do this
Within the Admin Panel -> Select Integrations -> Click Create custom integration
Within Permissions, check “Group chat bot”, “Message any member”, and “Read all messages”
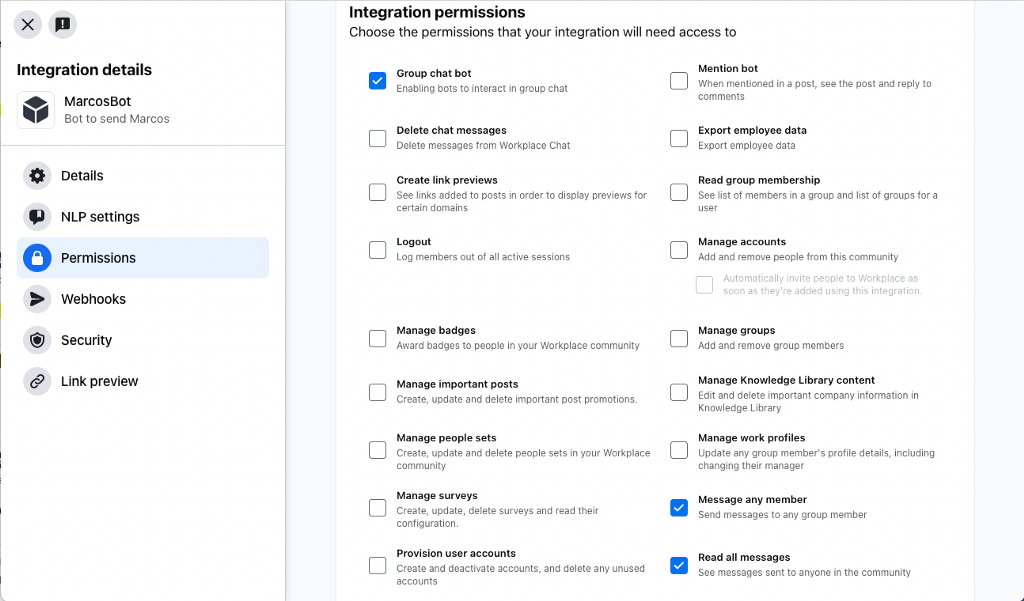
I recommend you do NOT select “Automatically remove unused permissions”. I found when building my bot that Workplace was removing necessary permissions when my bot wasn’t used frequently enough.
2. Set up a Dynamic Config through Statsig
In order for your bot to know which image to show, I recommend setting up a dynamic config. Dynamic config is a tool that replaces hard-coded values in your application with configuration parameters defined on the server. Once set up, that Statsig UI makes it super easy for both technical and non-technical users to add more marcos. Read here for more information on how to set up a dynamic config. Here is an example of how I set up ours:
{
statsig: {
src: '<https://statsig.com/images/logo_wordmark.svg>',
},
nicenice: {
src: '<https://cdn.britannica.com/86/64486-050-C8AEE0D0/Nice-France.jpg>',
},
}
For custom images, we used GitHub to host our images but you can use any image hosting website.
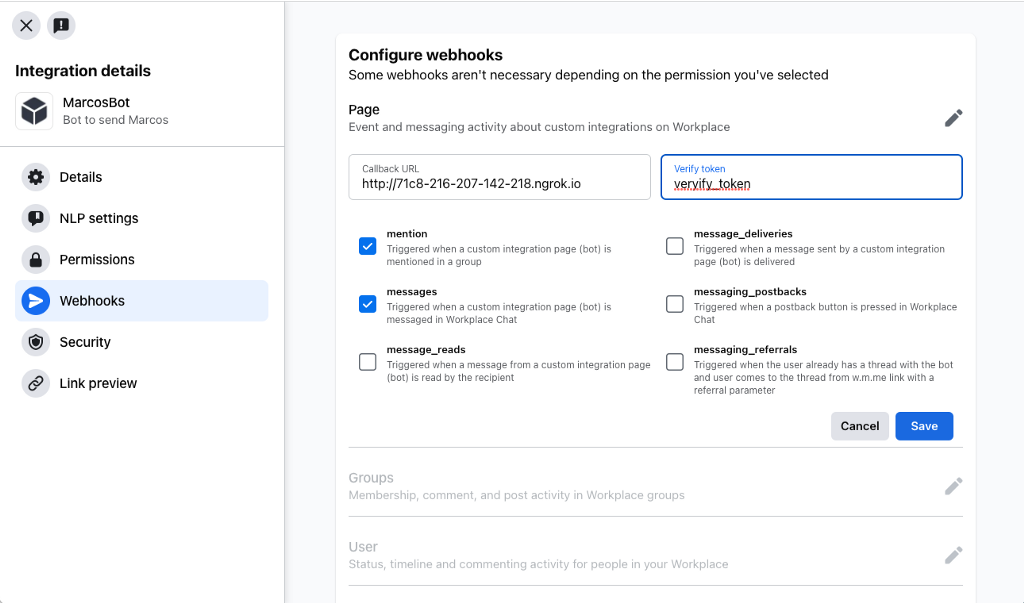
3. Create Your Webhook:
Create a new webhook wherever your webhooks live. Here’s what our webhook looks like:
4. Test Your Webhook
We used ngrok to test our webhook. Head here for more information on getting started. Once installed:
Run “ngrok http ”
You should get back a url that looks like this:
http://71c8-216-207-142-218.ngrok.io. Input that as the callback url in the page webhook.
Open up http://localhost:4040/ in your browser. Here is where you can see requests sent and received by your webhook.
Create a new Workplace group chat with your favorite coworkers and your bot, and trigger your bot by calling one of your macros such as “#m lgtm”
Use http://localhost:4040/ and console to debug as needed
Limitations
One major quirk I ran into while building this was the bot must be added to the group chat to work, which means:
If you forget to add the bot to your chat before you try to use the #m command it won’t work
You cannot use the bot in a direct message. In order for you to use the bot you would have to create a new group chat with yourself, the person you want to message and the bot.
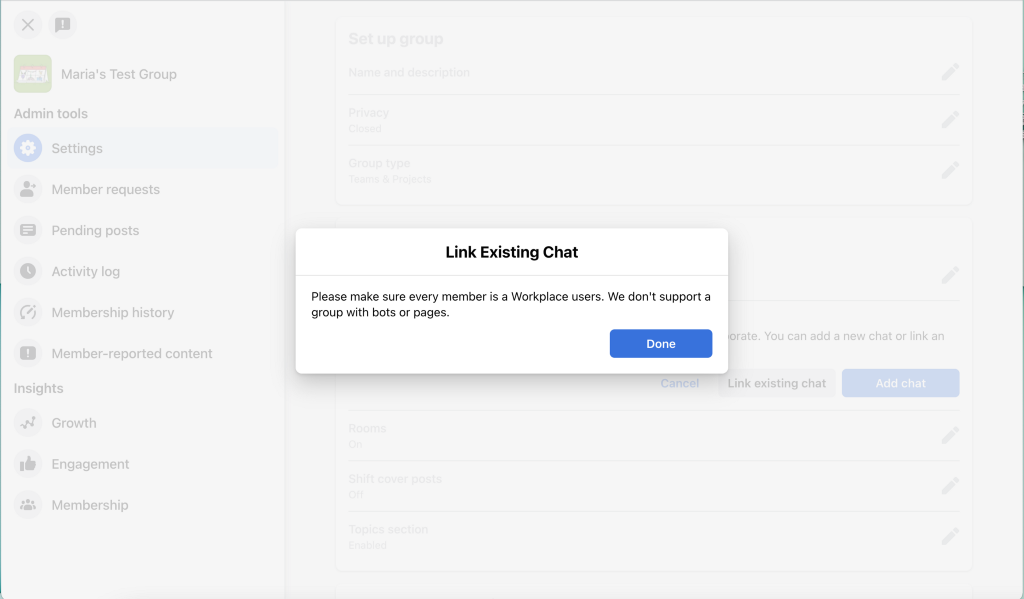
The bot can not be used in any chat that is associated with a group. Workplace has the ability to add a chat to a workplace group. This comes with nice features such as automatic membership and keeps both your posts and chats in one place. When you try to directly add the bot to the group/chat, the bot does not appear in the list of options when you hit Add people. If you unlink the chat and the group using admin options, you can then add the bot to the chat but you don’t get any of the benefits of having the chat and group linked. If you then try to relink the chat and the group, you are finally shown this error message making it clear that bots can not be used in a chat that is associated with a Workplace group.
Fun fact: you can actually get around this by creating a normal group chat → adding the bot to the chat → use the More Options button in the chat to got to Admin Options → click Create Group. Then your bot is in a chat associated with a group and works normally.
Final Thoughts
ngrok is an incredible tool. I found it confusing at first but once I got the hang of it it was straightforward to use and extremely helpful in testing my code. I will definitely use this tool again next time I am working work webhooks. Workplace custom integrations, on the other hand, I found incredibly frustrating because I know firsthand how powerful they can be. Internally at Facebook, they have built out a ton of incredible Workplace tools such as #remindme to remind you of something at a later date, @silent to make your messages not send out a notification, and #share to share posts from one group to another. All of these commands worked in all chats and groups without having to explicitly add a bot. I hope in the future Workplace will ship these features out to other companies and give us the ability to make our own custom integrations just as powerful.